Step-By-Step Easy Haunted House Craft for Halloween
- lenapodesta
- Oct 11, 2025
- 4 min read
Updated: Nov 11, 2025
As a kid, I was pretty sure I shared my bedroom with a friendly ghost named Gladys. Nothing crazy, just a little light haunting like the occasional strange shuffling noise or a shadowy figure sitting by my bedside. Once, I swear, a remote control car drove across the floor on its own. It had no batteries. Spooky.

And did you know that 60% of Americans think their house is haunted? That feels like a lot.
But don’t fret if you are in the minority and have never had the pleasure of being watched by the dead while you sleep. I got you. I’ve created this easy, step-by-step Halloween craft so you can have your very own haunted house, complete with spooky surprises lurking behind every door and window. And you don’t have to be limited to just ghosts. You can draw whatever scares or pleases you (or hopefully both scares and pleases you).
Need spooky inspiration?
We used Ed Emberley’s book Ed Emberley’s How to Draw Monsters and More Scary Stuff for the inspiration for the haunted house. But How to Draw Scary Monsters is jam packed with instructions for how to draw tons of other spooky creatures too. He shows you how to draw a witch, a cat, a bat, and a spider to name just a few.

Ed Emberley’s Big Orange Drawing Book is also a great pick with instructions for lots of other Halloween themed drawings. All of his books are fantastic and I urge you to check them all out from your local library or purchase them from your local bookstore.
"Who Is Ed Emberley?" you might ask (and why he’s the best).
If you don’t already know Ed Emberley, let me back up a little. He’s an award-winning author and illustrator best known for his step-by-step drawing books from the 80’s (aka my youth). His philosophy? Anyone can draw. Right on, Ed! I agree 100%.
As a kid, I spent hours following his easy step by step instructions and building entire worlds based off his designs. I love Ed Emberley’s approach to drawing by breaking everything down into simple shapes like circles, squares, triangles, and lines. That method still shapes how I draw today. All this to say, thanks Ed, you’re the best!

Why You’ll Love This Project
This easy, step-by-step haunted house craft is fun, low-mess, and perfect for kids or adults. Our entire family had a blast making them. The youngest (age 4) needed help cutting and assembling, but enjoyed decorating the house and the surprises behind the doors. To really tackle the cutting and assembly, I would say this project is best for ages 6 and up. We made these paper haunted houses at home and displayed them all October— and also through November (cause that’s how we roll). But they’d also make a great classroom Halloween project. Think of it like a Halloween advent calendar, with spooky surprises hiding behind each door and window.

This easy Halloween craft is perfect for:
Family Halloween nights
Classroom art projects
Rainy-day creative fun
Halloween themed library projects
Learning Ed Emberley’s simple drawing style
an easy, inexpensive, great way to celebrate Halloween while inspiring creativity in kids (and adults too)
ages 6 and older
OK, are you ready? Let’s Haunt a House.
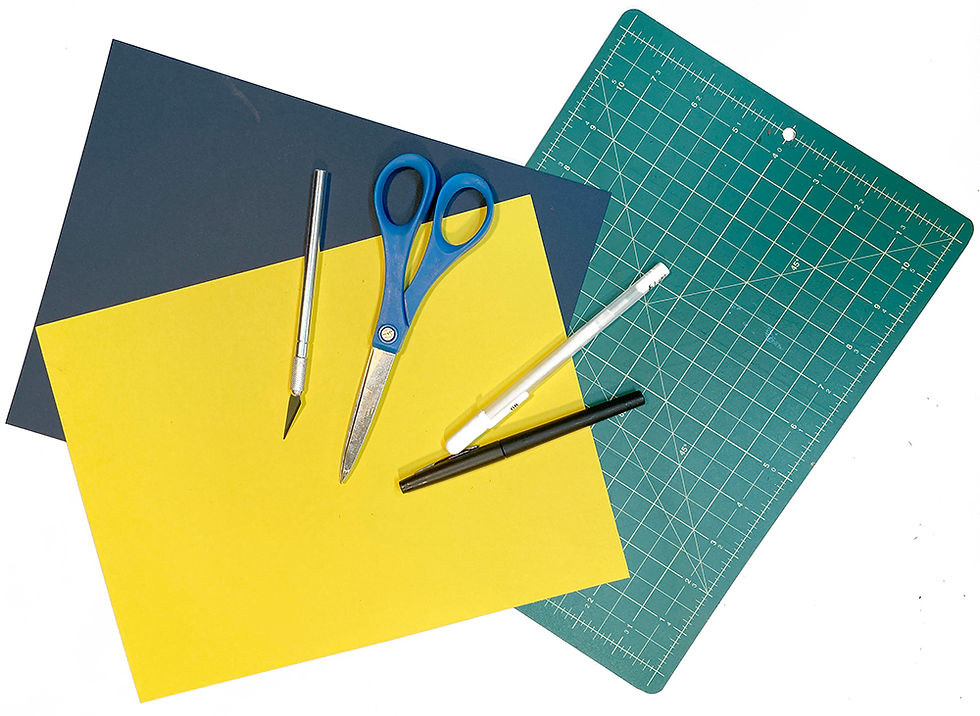
Materials You’ll Need For this Halloween paper craft:
Colored construction paper in spooky shades (black, orange, yellow, green) — 2 sheets in 2 different colors
Haunted house template (Download free haunted house template here)
Scissors
X-Acto knife or utility blade + cutting mat
Glue
Drawing pens (white gel pen, black marker, or your favorites!)

Step-by-Step Instructions: DIY Haunted House Craft
Gather your materials and clear a workspace.
Print the haunted house template or sketch your own design.
Stack the template on top of your two sheets of construction paper. Cut around the outer shape through both layers.
Using your top sheet, cut out doors and windows with scissors or a craft knife.
Fold along the dotted lines on the template to make the doors and shutters open.
Apply glue to the back of the top sheet. Avoid gluing the doors and shutters shut, but make sure to glue around the doors and windows for a clean seal.
Align and glue the two papers together.
Draw spooky creatures on the bottom paper behind the windows and doorways! Some ideas are: ghosts, mummies, witches, pumpkins, bats, spiders, or monsters. Ed Emberley’s How to Draw Monsters has loads of ideas.
Use the white gel pen to Decorate your haunted house with spiders, boarded up windows, cracks, and crumbling walls. If you don’t have a white gel pen, you can use lighter paper for the house and draw in the details with other colors or your black pen.


Tips for Success
Use contrasting paper colors (like black and orange or purple and green) for best visibility.
Thick card-stock works best.
Any glue will do, but a glue stick will ensure your paper stays smooth.
Add stickers, metallic pens, or other drawing tools like crayons for extra flair.
Display your haunted houses in a window or classroom bulletin board for a spooky surprise!
Have fun and make it your own!

Happy haunting everyone and a very happy halloween. Please tag your creations on ig with #spookypaperhouse so I can see all your wonderful creations pretty please!


Comments